提示:以下操作均在root權限下進行。
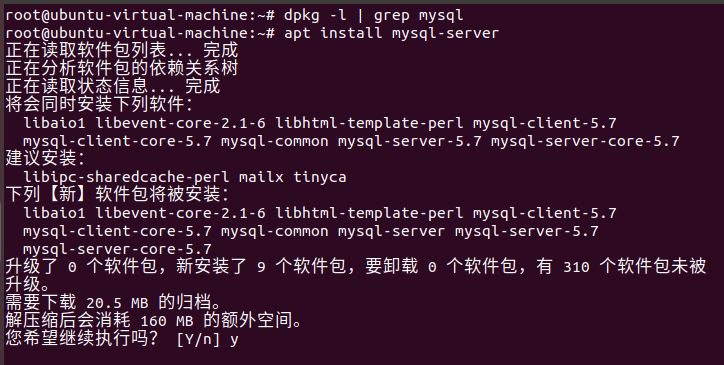
# 查看有沒有安裝MySQL:
dpkg -l | grep mysql
# 安裝MySQL:
apt install mysql-server
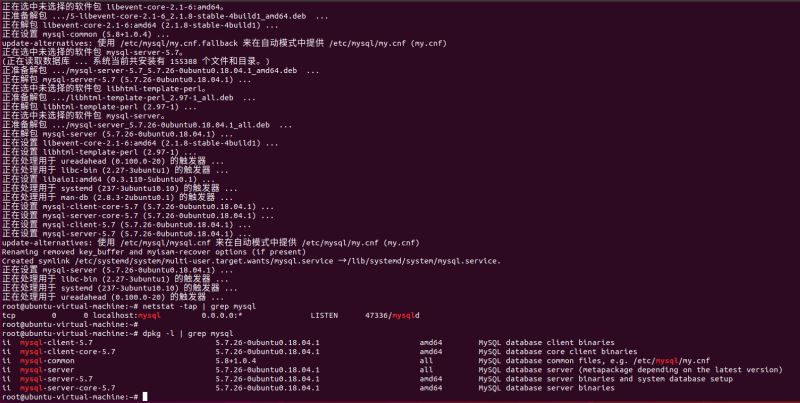
安裝完成之后可以使用如下命令來檢查是否安裝成功:
netstat -tap | grep mysql
通過上述命令檢查之后,如果看到有 mysql 的socket處于 LISTEN 狀態則表示安裝成功。
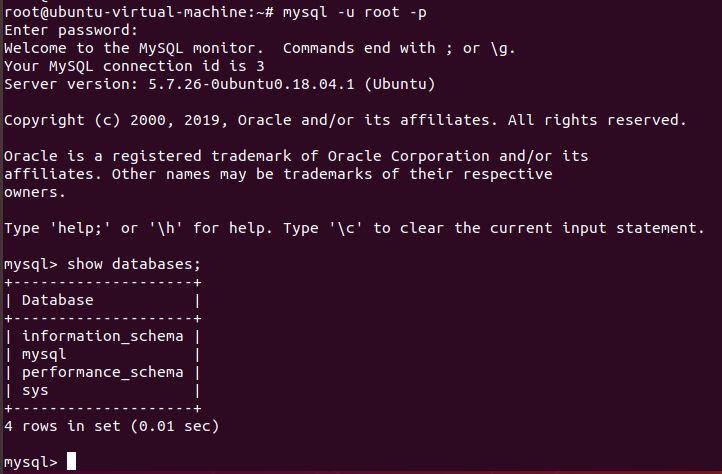
登錄mysql數據庫可以通過如下命令:
mysql -u root -p
-u 表示選擇登陸的用戶名, -p 表示登陸的用戶密碼,現在是mysql數據庫是沒有密碼的,Enter password:處直接回車,就能夠進入mysql數據庫。
然后通過 show databases; 就可以查看當前的所有數據庫。
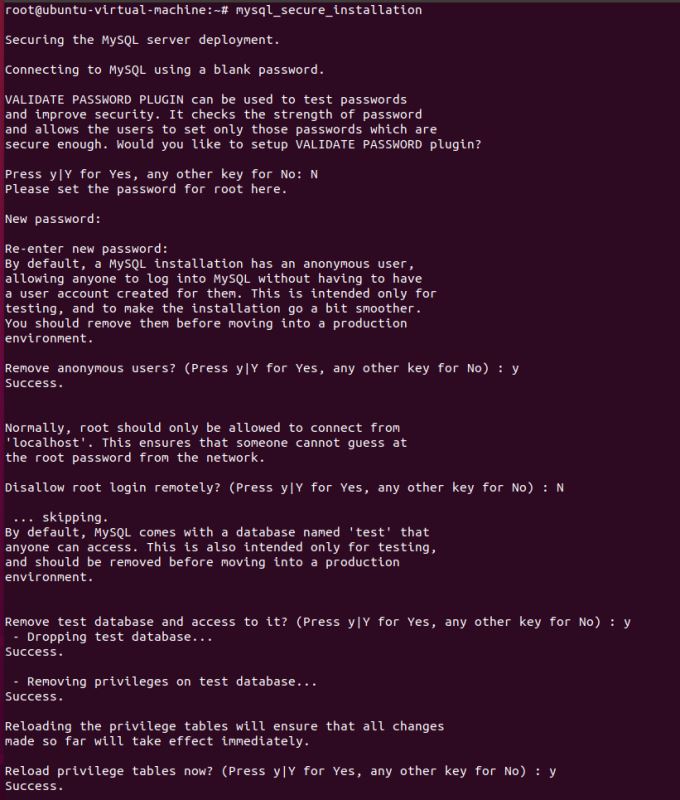
接下來,為了確保數據庫的安全性和正常運轉,對數據庫進行初始化操作。這個初始化操作涉及下面5個步驟。
(1)安裝驗證密碼插件。
(2)設置root管理員在數據庫中的專有密碼。
(3)隨后刪除匿名賬戶,并使用root管理員從遠程登錄數據庫,以確保數據庫上運行的業務的安全性。
(4)刪除默認的測試數據庫,取消測試數據庫的一系列訪問權限。
(5)刷新授權列表,讓初始化的設定立即生效。
對于上述數據庫初始化的操作步驟,在下面的輸出信息旁邊我做了簡單注釋。
root@ubuntu-virtual-machine:~# mysql_secure_installation
Securing the MySQL server deployment.
Connecting to MySQL using a blank password.
VALIDATE PASSWORD PLUGIN can be used to test passwords
and improve security. It checks the strength of password
and allows the users to set only those passwords which are
secure enough. Would you like to setup VALIDATE PASSWORD plugin? #要安裝驗證密碼插件嗎?
Press y|Y for Yes, any other key for No: N # 這里我選擇N
Please set the password for root here.
New password: #輸入要為root管理員設置的數據庫密碼
Re-enter new password: #再次輸入密碼
By default, a MySQL installation has an anonymous user,
allowing anyone to log into MySQL without having to have
a user account created for them. This is intended only for
testing, and to make the installation go a bit smoother.
You should remove them before moving into a production
environment.
Remove anonymous users? (Press y|Y for Yes, any other key for No) : y #刪除匿名賬戶
Success.
Normally, root should only be allowed to connect from
'localhost'. This ensures that someone cannot guess at
the root password from the network.
Disallow root login remotely? (Press y|Y for Yes, any other key for No) : N #禁止root管理員從遠程登錄,這里我沒有禁止
... skipping.
By default, MySQL comes with a database named 'test' that
anyone can access. This is also intended only for testing,
and should be removed before moving into a production
environment.
Remove test database and access to it? (Press y|Y for Yes, any other key for No) : y #刪除test數據庫并取消對它的訪問權限
- Dropping test database...
Success.
- Removing privileges on test database...
Success.
Reloading the privilege tables will ensure that all changes
made so far will take effect immediately.
Reload privilege tables now? (Press y|Y for Yes, any other key for No) : y #刷新授權表,讓初始化后的設定立即生效
Success.
All done!
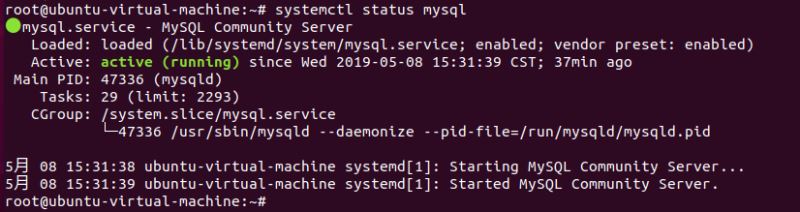
檢查mysql服務狀態:
systemctl status mysql
顯示如下結果說明mysql服務運行是正常的:
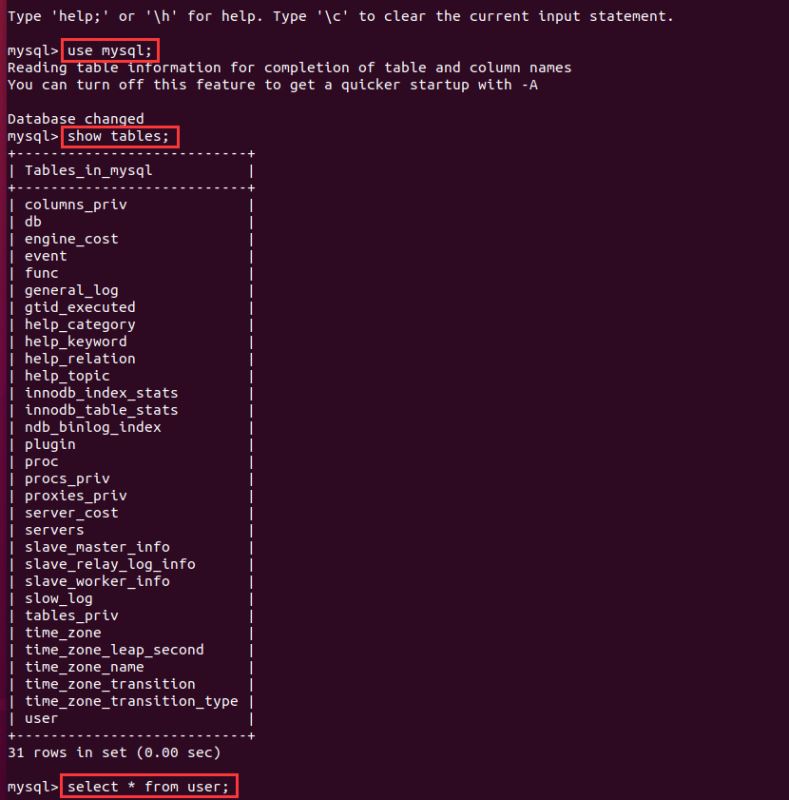
再次用mysql -u root -p命令,Enter password:處輸入剛設置的密碼,回車,就能夠進入mysql數據庫。
使用 use mysql; 命令打開mysql命名的數據庫,顯示當前數據庫的表:show tables; 查詢user表里的數據:select * from user;(user表里是mysql數據庫的所有賬戶信息)
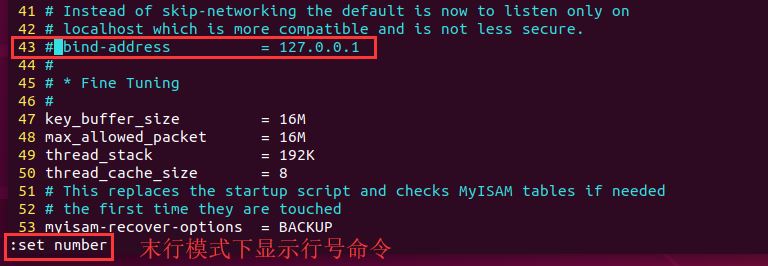
現在配置mysql允許遠程訪問,首先編輯 /etc/mysql/mysql.conf.d/mysqld.cnf 配置文件:
vim /etc/mysql/mysql.conf.d/mysqld.cnf
注釋掉bind-address = 127.0.0.1
保存退出,然后進入mysql數據庫,執行授權命令:
mysql -u root -p
mysql> grant all on *.* to root@'%' identified by '你的密碼' with grant option;
mysql> flush privileges; # 刷新權限
mysql> exit
然后執行exit命令退出mysql服務,再執行如下命令重啟mysql:
systemctl restartmysql
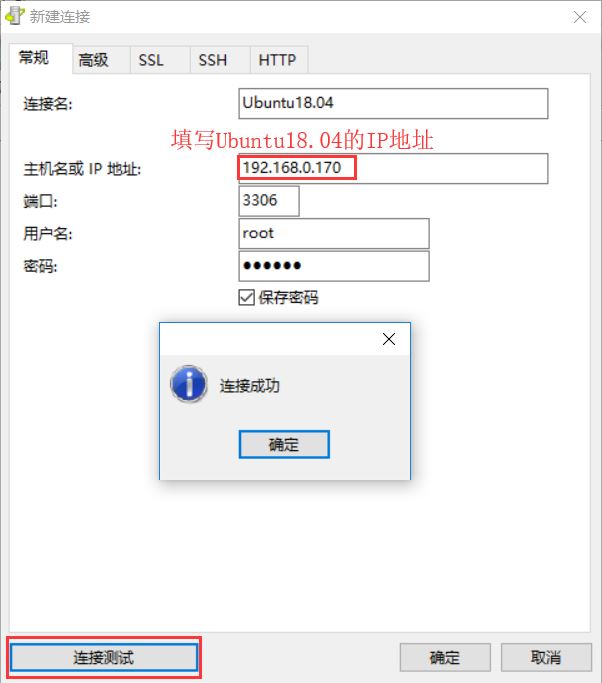
現在Windows下可以使用Navicat圖形化工具遠程連接Ubuntu下的MySQL數據庫,輸入剛授權遠程權限的密碼。
這里順便再分享下:Navicat for MySQL 10.1.7安裝包
鏈接: https://pan.baidu.com/s/12P1BcvQsRetBY0jGIvwILw&shfl=shareset 提取碼: 8bft
OK,到這里Ubuntu18.04下安裝MySQL已經完成了。
操作過程中我遇到了以下錯誤:
E: 無法獲得鎖 /var/lib/dpkg/lock-frontend - open (11: 資源暫時不可用)
E: Unable to acquire the dpkg frontend lock (/var/lib/dpkg/lock-frontend), is another process using it?
解決方法,參考自文章:https://www.jb51.net/article/172460.htm
總結
以上所述是小編給大家介紹的Ubuntu18.04下安裝MySQL的方法,希望對大家有所幫助,如果大家有任何疑問請給我留言,小編會及時回復大家的。在此也非常感謝大家對腳本之家網站的支持!
如果你覺得本文對你有幫助,歡迎轉載,煩請注明出處,謝謝!
