目錄
- 引言
- 一、代碼啟動tomcat
- 二、tomcat框架
- 三、創建容器(addWebapp())
- 四、啟動容器(tomcat.start())
- 五、總結
引言
上一篇博客我們將tomcat源碼在本地成功運行了,所以在本篇博客中我們從源碼層面分析,tomcat在啟動的過程中,是如何初始化servlet容器的。我們平常都是將我們的服務部署到 tomcat中,然后修改一下配置文件,啟動就可以對外提供 服務了,但是我們對于其中的一些流程并不是非常的了解,例如如何加載的web.xml等。這是我們分析servlet 和 sringMVC必不可少的過程。
注釋源碼地址:https://github.com/good-jack/tomcat_source/tree/master
一、代碼啟動tomcat
平常我們不論是Windows還是linux,我們都是通過腳本來啟動tomcat,這對于我們分析源碼不是很友好,所以我們 需要通過代碼啟動,啟動代碼如下:
Tomcat tomcat = new Tomcat();
        tomcat.setPort(8080);
        //new 出各層容器,并且維護各層容器的關系
        tomcat.addWebapp("/","/");
        tomcat.start();
        //阻塞監聽端口
        tomcat.getServer().await();
啟動代碼還是非常非常簡單,從代碼中我們就可以看出,我們本篇博客主要分析的就是 addWebapp()方法和start()方法,通過這兩個方法我們就可以找到servlet容器是在什么時候被初始化的。
二、tomcat框架
在我們進行分析上面兩個方法之前,我們先總結一下tomcat的基礎框架,其實從我們非常熟悉的 server.xml配置文件中就可以知道,tomcat就是一系列父子容器組成:
Server ---> Service --> Connector Engine addChild---> context(servlet容器) ,這就是我們從配置文件中分析出來的幾個容器,tomcat啟動時候就是逐層啟動容器。
三、創建容器(addWebapp())
3.1 方法 調用流程圖
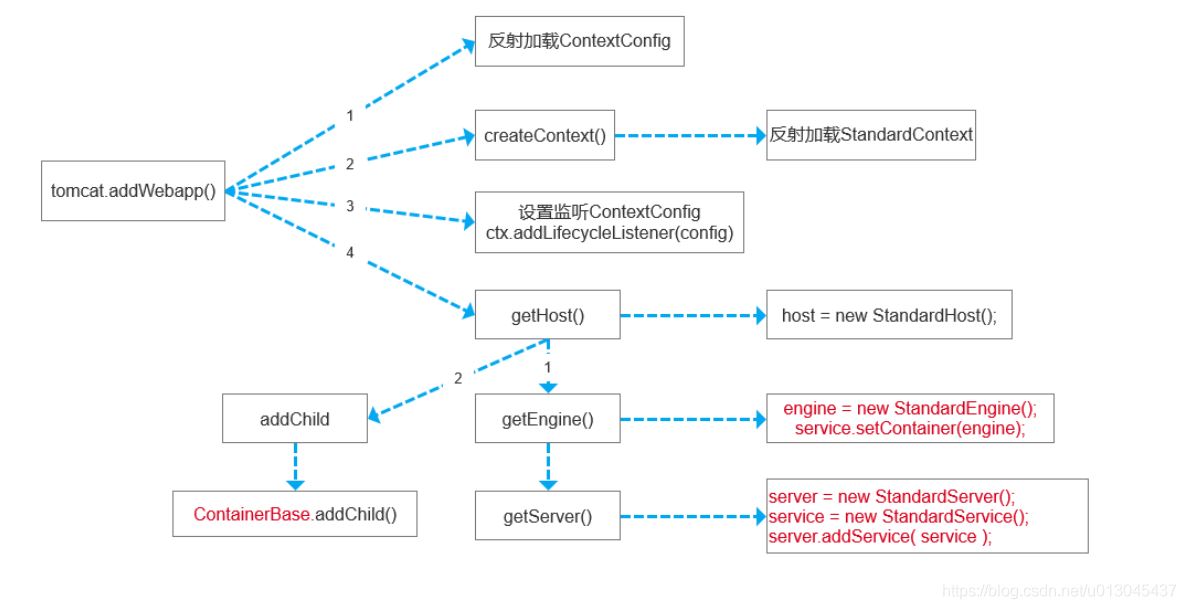
上面的流程圖就是,從源碼中逐步分析出來的幾個重要的方法,這對于我們分析源碼非常有幫助。
3.2 源碼分析
1)通過反射獲得configContext監聽器
方法路徑:package org.apache.catalina.startup.Tomcat.addWebapp(Host host, String contextPath, String docBase);
    public Context  addWebapp(Host host, String contextPath, String docBase) {
        //通過反射獲得一個監聽器  ContextConfig,
        //通過反射得到的一定是LifecycleListener的一個實現類,進入getConfigClass得到實現類(org.apache.catalina.startup.ContextConfig)
        LifecycleListener listener = null;
        try {
            Class<?> clazz = Class.forName(getHost().getConfigClass());
            listener = (LifecycleListener) clazz.getConstructor().newInstance();
        } catch (ReflectiveOperationException e) {
            // Wrap in IAE since we can't easily change the method signature to
            // to throw the specific checked exceptions
            throw new IllegalArgumentException(e);
        }

        return addWebapp(host, contextPath, docBase, listener);
    }
2) 獲得一個context容器(StandardContext)
在下面代碼中,createContext()方法通過反射加載StandardContext容器,并且將設置監聽ContextConfig, ctx.addLifecycleListener(config);
public Context addWebapp(Host host, String contextPath, String docBase,
            LifecycleListener config) {

        silence(host, contextPath);

        //獲得一個context容器(StandardContext)
        Context ctx = createContext(host, contextPath);
        ctx.setPath(contextPath);
        ctx.setDocBase(docBase);

        if (addDefaultWebXmlToWebapp) {
            ctx.addLifecycleListener(getDefaultWebXmlListener());
        }

        ctx.setConfigFile(getWebappConfigFile(docBase, contextPath));
        //把監聽器添加到context中去
        ctx.addLifecycleListener(config);

        if (addDefaultWebXmlToWebapp && (config instanceof ContextConfig)) {
            // prevent it from looking ( if it finds one - it'll have dup error )
            ((ContextConfig) config).setDefaultWebXml(noDefaultWebXmlPath());
        }

        if (host == null) {
            //getHost會逐層創建容器,并維護容器父子關系
            getHost().addChild(ctx);
        } else {
            host.addChild(ctx);
        }

        return ctx;
    }
3)維護各層容器
getHost()方法中得到各層容器,并且維護父親容器關系,其中包括,server容器、Engine容器。并且將StandardContext容器通過getHost().addChild(ctx); 調用containerBase中的addChild()方法維護在 children 這個map中。
  public Host getHost() {
        //將每一層的容器都new 出來
        Engine engine = getEngine();
        if (engine.findChildren().length > 0) {
            return (Host) engine.findChildren()[0];
        }

        Host host = new StandardHost();
        host.setName(hostname);
        //維護tomcat中的父子容器
        getEngine().addChild(host);
        return host;
    }
getEngine().addChild(host); 方法選擇調用父類containerBase中的addChild方法
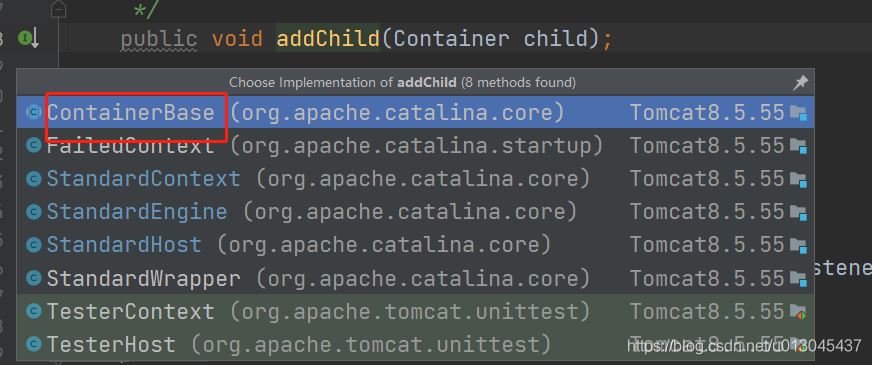
  @Override
    public void addChild(Container child) {
        if (Globals.IS_SECURITY_ENABLED) {
            PrivilegedAction<Void> dp =
                new PrivilegedAddChild(child);
            AccessController.doPrivileged(dp);
        } else {
            //這里的child 參數是 context 容器
            addChildInternal(child);
        }
    }
addChildInternal()方法的 核心代碼
 private void addChildInternal(Container child) {

        if( log.isDebugEnabled() )
            log.debug("Add child " + child + " " + this);
        synchronized(children) {
            if (children.get(child.getName()) != null)
                throw new IllegalArgumentException("addChild:  Child name '" +
                                                   child.getName() +
                                                   "' is not unique");
            child.setParent(this);  // May throw IAE
            children.put(child.getName(), child);
    }
四、啟動容器(tomcat.start())
4.1、方法調用流程圖

4.2、源碼分析
說明:StandardServer 、StandardService、StandardEngine等容器都是繼承LifecycleBase
所以這里是模板模式的經典應用
1)逐層啟動容器
此時的server對應的是我們前面創建的StandardServer
  public void start() throws LifecycleException {
        //防止server容器沒有創建
        getServer();
        //獲得connector容器,并且將得到的connector容器設置到service容器中
        getConnector();
        //這里的start的實現是在 LifecycleBase類中實現
        //LifecycleBase方法是一個模板方法,在tomcat啟動流程中非常關鍵
        server.start();
    }
2) 進入start方法
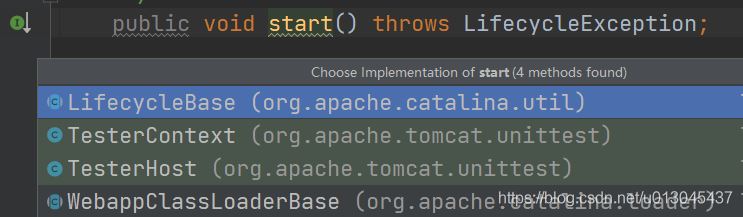
進入LifecycelBase中的start方法,其中核心方法是startInternal。
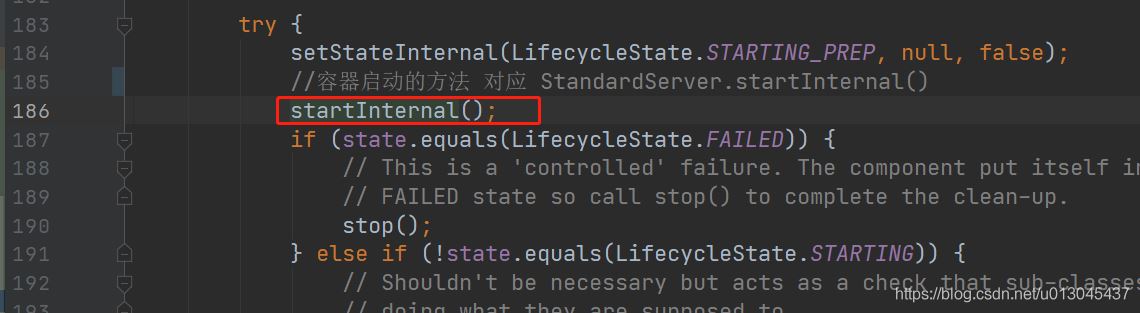
從上面我們知道現在我們調用的是StandardServer容器的startInternal()方法,所以我們這里選擇的是StandardServer
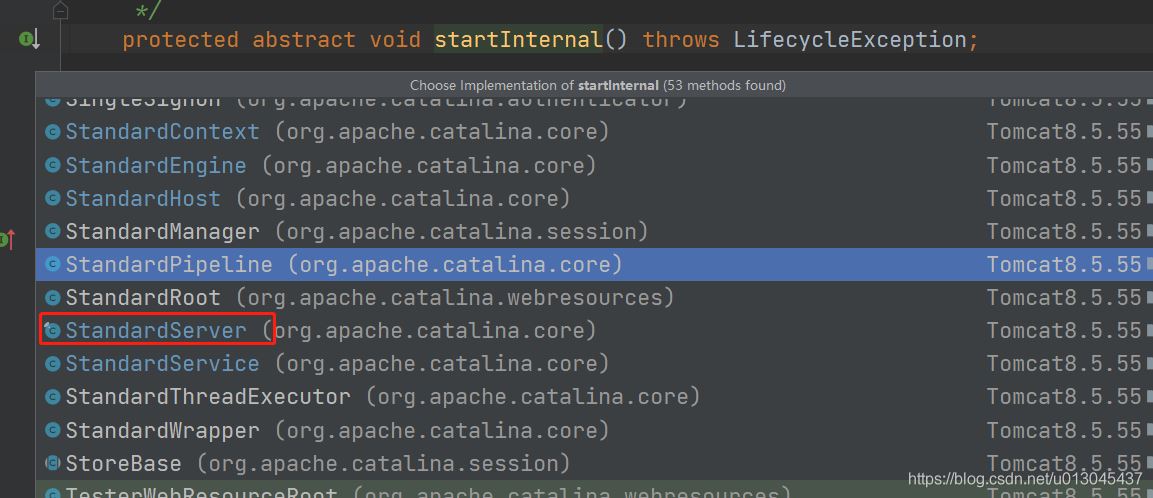
方法路徑:org.apache.catalina.core.StandardServer.startInternal()
protected void startInternal() throws LifecycleException {

        fireLifecycleEvent(CONFIGURE_START_EVENT, null);
        setState(LifecycleState.STARTING);

        globalNamingResources.start();

        // Start our defined Services
        synchronized (servicesLock) {
            //啟動 service容器,一個tomcat中可以配置多個service容器,每個service容器都對應這我們的一個服務應用
            for (Service service : services) {
                //對應 StandardService.startInternal()
                service.start();
            }
        }
    }
從上面代碼中我們可以看出,啟動server容器的時候需要啟動子容器 service容器,從這里開始就是容器 逐層向向內引爆,所以接下來就是開始依次調用各層容器的star方法。在這里就不在贅述。
2)ContainerBase中的startInternal()方法 核心代碼,從這開始啟動StandardContext容器
 // Start our child containers, if any
        //在addWwbapp的流程中 addChild方法中加入的,所以這里需要找出來
        //這里找出來的就是 context 容器
        Container children[] = findChildren();
        List<Future<Void>> results = new ArrayList<>();
        for (Container child : children) {
            //通過線程池 異步的方式啟動線程池 開始啟動 context容器,進入new StartChild
            results.add(startStopExecutor.submit(new StartChild(child)));
        }
new StartChild(child)) 方法開始啟動StandardContext容器
    private static class StartChild implements Callable<Void> {

        private Container child;

        public StartChild(Container child) {
            this.child = child;
        }

        @Override
        public Void call() throws LifecycleException {
            //開始啟動context,實際調用 StandardContext.startInternal()
            child.start();
            return null;
        }
    }
StandardContext.startInternal() 方法中的核心代碼:
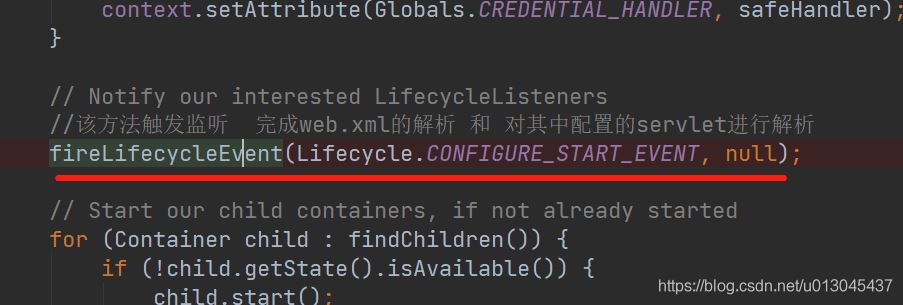
   protected void fireLifecycleEvent(String type, Object data) {
        LifecycleEvent event = new LifecycleEvent(this, type, data);
        //lifecycleListeners 在addwebapp方法的第一步中,設置的監聽的 contextConfig對象
        for (LifecycleListener listener : lifecycleListeners) {
            //這里調用的是 contextConfig的lifecycleEvent()方法
            listener.lifecycleEvent(event);
        }
    }
進入到 contextConfig中的lifecycleEvent()方法
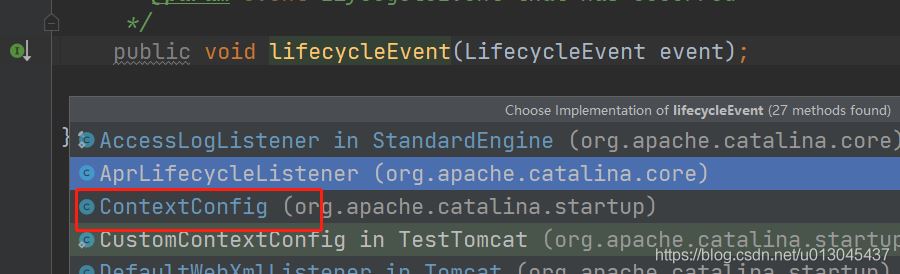
public void lifecycleEvent(LifecycleEvent event) {

        // Identify the context we are associated with
        try {
            context = (Context) event.getLifecycle();
        } catch (ClassCastException e) {
            log.error(sm.getString("contextConfig.cce", event.getLifecycle()), e);
            return;
        }

        // Process the event that has occurred
        if (event.getType().equals(Lifecycle.CONFIGURE_START_EVENT)) {
            //完成web.xml的內容解析
            configureStart();
        } else if (event.getType().equals(Lifecycle.BEFORE_START_EVENT)) {
            beforeStart();
        } else if (event.getType().equals(Lifecycle.AFTER_START_EVENT)) {
            // Restore docBase for management tools
            if (originalDocBase != null) {
                context.setDocBase(originalDocBase);
            }
        } else if (event.getType().equals(Lifecycle.CONFIGURE_STOP_EVENT)) {
            configureStop();
        } else if (event.getType().equals(Lifecycle.AFTER_INIT_EVENT)) {
            init();
        } else if (event.getType().equals(Lifecycle.AFTER_DESTROY_EVENT)) {
            destroy();
        }

    }
在上面方法中,完成對web.xml的加載和解析,同時加載xml中配置的servlet并且封裝成wrapper對象。
3)、啟動servlet容器,StandardContext.startInternal() 中的 loadOnStartup(findChildren())方法
public boolean loadOnStartup(Container children[]) {

        // Collect "load on startup" servlets that need to be initialized
        TreeMap<Integer, ArrayList<Wrapper>> map = new TreeMap<>();
        for (Container child : children) {
            //這里的 Wrapper就是 我們前面封裝的 servlet
            Wrapper wrapper = (Wrapper) child;
            int loadOnStartup = wrapper.getLoadOnStartup();
            if (loadOnStartup < 0) {
                continue;
            }
            Integer key = Integer.valueOf(loadOnStartup);
            ArrayList<Wrapper> list = map.get(key);
            if (list == null) {
                list = new ArrayList<>();
                map.put(key, list);
            }
            list.add(wrapper);
        }

        // Load the collected "load on startup" servlets
        for (ArrayList<Wrapper> list : map.values()) {
            for (Wrapper wrapper : list) {
                try {
                    //通過 load 方法  最終會調用 servlet的init方法
                    wrapper.load();
                } catch (ServletException e) {
                    getLogger().error(sm.getString("standardContext.loadOnStartup.loadException",
                          getName(), wrapper.getName()), StandardWrapper.getRootCause(e));
                    // NOTE: load errors (including a servlet that throws
                    // UnavailableException from the init() method) are NOT
                    // fatal to application startup
                    // unless failCtxIfServletStartFails="true" is specified
                    if(getComputedFailCtxIfServletStartFails()) {
                        return false;
                    }
                }
            }
        }
        return true;

    }
通過 load 方法 最終會調用 servlet的init方法。
五、總結
上面內容就是整個tomcat是如何調用servlet初始化方法的流程,整個流程小編的理解,如果有錯誤,歡迎指正,小編已經在源碼中重要部分進行了注釋,所以如果有需要的各位讀者,可以下載我的注釋 源碼,注釋源碼地址:
https://github.com/good-jack/tomcat_source/tree/master
到此這篇關于詳解從源碼分析tomcat如何調用Servlet的初始化的文章就介紹到這了,更多相關tomcat調用Servlet初始化內容請搜索腳本之家以前的文章或繼續瀏覽下面的相關文章希望大家以后多多支持腳本之家!
