本文實例講述了YII2框架中驗證碼的簡單使用方法。分享給大家供大家參考,具體如下:
驗證碼的使用是比較頻繁的。YII2中已經幫我們做好了封裝。
首先我們在控制器里創建一個actions方法,用于使用yii\captcha\CaptchaAction
?php

namespace app\controllers;

use YII;
use yii\web\Controller;

class IndexController extends Controller
{
  public function actionIndex()
  {
    if (YII::$app->request->isPost) {
      //獲取post過來的驗證碼
      $verify = YII::$app->request->post('verify');

      //我們手動進行驗證,第二個參數表示是否區分大小寫
      if ($this->createAction('captcha')->validate($verify, false)) {
        echo '成功';
      } else {
        echo '失敗';
      }

    } else {
      return $this->renderPartial('index');
    }
  }

  //actions的作用主要是共用功能相同的方法
  //當用戶訪問index/captcha時,actions就會調用yii\captcha\CaptchaAction方法
  public function actions()
  {
    return [
      'captcha' => [
        'class' => 'yii\captcha\CaptchaAction',
        'fixedVerifyCode' => null,
        //背景顏色
        'backColor' => 0x000000,
        //最大顯示個數
        'maxLength' => 4,
        //最少顯示個數
        'minLength' => 4,
        //間距
        'padding' => 2,
        //高度
        'height' => 30,
        //寬度
        'width' => 85,
        //字體顏色
        'foreColor' => 0xffffff,
        //設置字符偏移量
        'offset' => 4,
      ],
    ];
  }
}
顯示頁面代碼如下:
?php
use yii\helpers\Url;
use yii\helpers\Html;
?>
!doctype html>
html lang="zh-CN">
head>
  meta charset="UTF-8">
  title>分頁顯示/title>
/head>
body>
  form action="?php echo Url::toRoute('index/index'); ?>" method="post">
    驗證碼:input type="text" name="verify">br>
    img id="verifyImg" src="?php echo Url::toRoute('index/captcha'); ?>">br>
    input type="submit" value="提交">
    input name="_csrf" type="hidden" value="?php echo \Yii::$app->request->csrfToken; ?>">
  /form>

  ?php echo Html::jsFile('@web/js/jquery-3.3.1.min.js'); ?>
  script type="text/javascript">
    $(function () {
      //處理點擊刷新驗證碼
      $("#verifyImg").on("click", function () {
        $.get("?php echo Url::toRoute('index/captcha') ?>?refresh", function (data) {
          $("#verifyImg").attr("src", data["url"]);
        }, "json");
      });
    });
  /script>
/body>
/html>
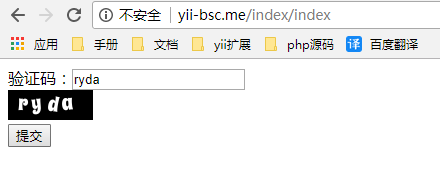
演示結果如下:
上面控制器中驗證碼的驗證方式是我們手動的。我們也可以創建一個模型配置rules()來自動完成。
?php

namespace app\models;

use yii\base\Model;

class VerifyForm extends Model
{

  //變量名為你表單中輸入驗證碼控件的name
  public $verify;

  public function rules()
  {
    return [
      ['verify', 'required', 'message' => '請填寫驗證碼'],
      //注意captchaAction的設置,指向你顯示驗證碼的action,這里我們的是index/captcha
      ['verify', 'captcha', 'captchaAction' => 'index/captcha', 'caseSensitive' => false, 'message' => '驗證碼錯誤'],
    ];
  }
}
控制器代碼修改如下:
?php

namespace app\controllers;

use YII;
use app\models\VerifyForm;
use yii\web\Controller;

class IndexController extends Controller
{
  public function actionIndex()
  {
    if (YII::$app->request->isPost) {
      $verify = new VerifyForm();
      $verify->load(YII::$app->request->post(), '');

      //自動驗證
      if ($verify->validate()) {
        echo '成功';
      } else {
        var_dump($verify->errors);
      }

    } else {
      return $this->renderPartial('index');
    }
  }

  //actions的作用主要是共用功能相同的方法
  //當用戶訪問index/captcha時,actions就會調用yii\captcha\CaptchaAction方法
  public function actions()
  {
    return [
      'captcha' => [
        'class' => 'yii\captcha\CaptchaAction',
        'fixedVerifyCode' => null,
        //背景顏色
        'backColor' => 0x000000,
        //最大顯示個數
        'maxLength' => 4,
        //最少顯示個數
        'minLength' => 4,
        //間距
        'padding' => 2,
        //高度
        'height' => 30,
        //寬度
        'width' => 85,
        //字體顏色
        'foreColor' => 0xffffff,
        //設置字符偏移量
        'offset' => 4,
      ],
    ];
  }
}
更多關于Yii相關內容感興趣的讀者可查看本站專題:《Yii框架入門及常用技巧總結》、《php優秀開發框架總結》、《smarty模板入門基礎教程》、《php面向對象程序設計入門教程》、《php字符串(string)用法總結》、《php+mysql數據庫操作入門教程》及《php常見數據庫操作技巧匯總》
希望本文所述對大家基于Yii框架的PHP程序設計有所幫助。
您可能感興趣的文章:- yii2.0框架使用 beforeAction 防非法登陸的方法分析
- Yii2使用$this->context獲取當前的Module、Controller(控制器)、Action等
- Yii框架獲取當前controlle和action對應id的方法
- yii框架配置默認controller和action示例
- YII2框架中分頁組件的使用方法示例
- YII2框架中自定義用戶認證模型,完成登陸和注冊操作示例
- YII2框架實現表單中上傳單個文件的方法示例
- YII2框架中操作數據庫的方式實例分析
- YII2框架自定義全局函數的實現方法小結
- yii2.0框架場景的簡單使用示例
- YII2框架中actions的作用與使用方法示例
