知識(shí)點(diǎn):在windows系統(tǒng)中,搭建圖片上傳服務(wù)器
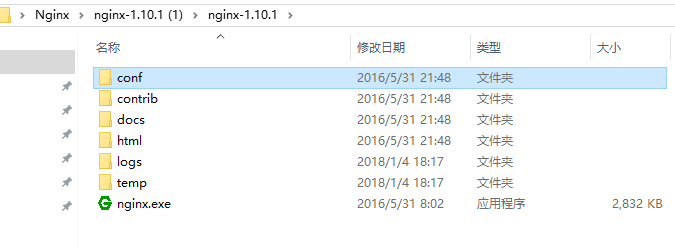
1.進(jìn)入官網(wǎng)下載nginx壓縮包,解壓后目錄如下
2.在解壓后的conf/nginx.conf配置文件中,添加添加或者修改帶有顏色地方的代碼
#user nobody;
worker_processes 1;
#error_log logs/error.log;
#error_log logs/error.log notice;
#error_log logs/error.log info;
#pid logs/nginx.pid;

events {
worker_connections 1024;
}

http {
include mime.types;
default_type application/octet-stream;

#log_format main '$remote_addr - $remote_user [$time_local] "$request" '
# '$status $body_bytes_sent "$http_referer" '
# '"$http_user_agent" "$http_x_forwarded_for"';

#access_log logs/access.log main;

sendfile on;
#tcp_nopush on;

#keepalive_timeout 0;
keepalive_timeout 65;

#gzip on;

server {
listen 8089;
server_name localhost;

#charset utf-8;
#access_log logs/host.access.log main;

#添加博客的代碼
location ~ .*\.(gif|jpg|jpeg|png)$ {
expires 24h;
root G:/images/;#指定圖片存放路徑
access_log G:/images/log;#圖片路徑
proxy_store on;
proxy_store_access user:rw group:rw all:rw;
proxy_temp_path G:/images/;#圖片路徑
proxy_redirect off;

proxy_set_header Host 127.0.0.1;
proxy_set_header X-Real-IP $remote_addr;
proxy_set_header X-Forwarded-For $proxy_add_x_forwarded_for;
client_max_body_size 10m;
client_body_buffer_size 1280k;
proxy_connect_timeout 900;
proxy_send_timeout 900;
proxy_read_timeout 900;
proxy_buffer_size 40k;
proxy_buffers 40 320k;
proxy_busy_buffers_size 640k;
proxy_temp_file_write_size 640k;
if ( !-e $request_filename)
{
proxy_pass http://169.254.140.133:8089; #代理訪(fǎng)問(wèn)地址
}
}

location / {
root html;
index index.html index.htm;
}

#error_page 404 /404.html;

# redirect server error pages to the static page /50x.html
#
error_page 500 502 503 504 /50x.html;
location = /50x.html {
root html;
}

# proxy the PHP scripts to Apache listening on 127.0.0.1:80
#
#location ~ \.php$ {
# proxy_pass http://127.0.0.1;
#}

# pass the PHP scripts to FastCGI server listening on 127.0.0.1:9000
#
#location ~ \.php$ {
# root html;
# fastcgi_pass 127.0.0.1:9000;
# fastcgi_index index.php;
# fastcgi_param SCRIPT_FILENAME /scripts$fastcgi_script_name;
# include fastcgi_params;
#}

# deny access to .htaccess files, if Apache's document root
# concurs with nginx's one
#
#location ~ /\.ht {
# deny all;
#}
}


# another virtual host using mix of IP-, name-, and port-based configuration
#
#server {
# listen 8000;
# listen somename:8080;
# server_name somename alias another.alias;

# location / {
# root html;
# index index.html index.htm;
# }
#}


# HTTPS server
#
#server {
# listen 443 ssl;
# server_name localhost;

# ssl_certificate cert.pem;
# ssl_certificate_key cert.key;

# ssl_session_cache shared:SSL:1m;
# ssl_session_timeout 5m;

# ssl_ciphers HIGH:!aNULL:!MD5;
# ssl_prefer_server_ciphers on;

# location / {
# root html;
# index index.html index.htm;
# }
#}
}
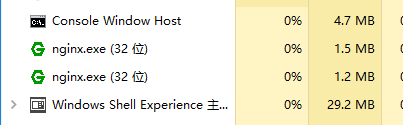
3.點(diǎn)擊綠色的nginx.exe圖標(biāo),啟動(dòng)服務(wù)器,在任務(wù)管理器看到如下,則啟動(dòng)成功
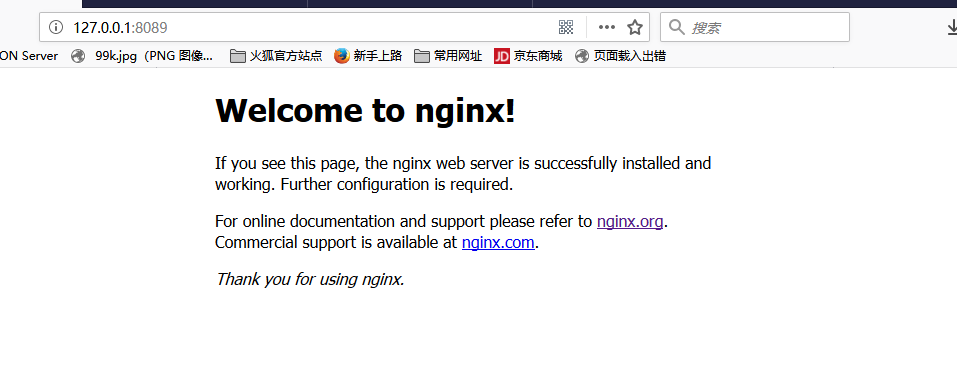
4.在瀏覽器中輸入http://127.0.0.1:8089可以看到
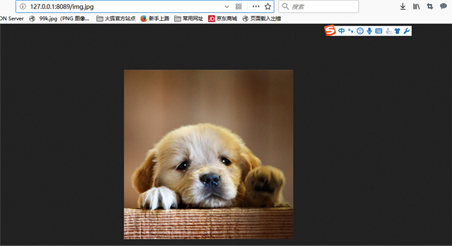
5.在G:/images/下,放一個(gè)圖片,在瀏覽器地址欄輸入http://127.0.0.1:8089/img.jpg,就可以訪(fǎng)問(wèn)到服務(wù)器上的圖片
以上就是本文的全部?jī)?nèi)容,希望對(duì)大家的學(xué)習(xí)有所幫助,也希望大家多多支持腳本之家。
