1,將java項目打成jar包
這里我用到的是maven工具
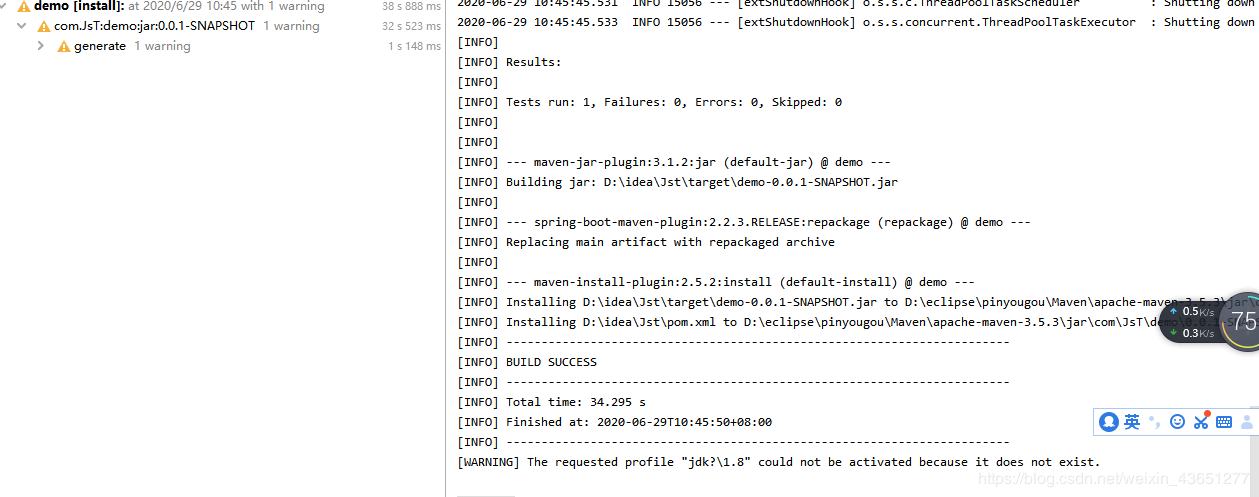
這里有兩個項目,打包完成后一個為demo.jar,另一個為jst.jar
2.準備工具
1.服務器
2.域名(注:經過備案)
3.Xshell用于連接服務器
4.WinScp(注:視圖工具,用于傳輸jar)
3.將jar包傳入服務器
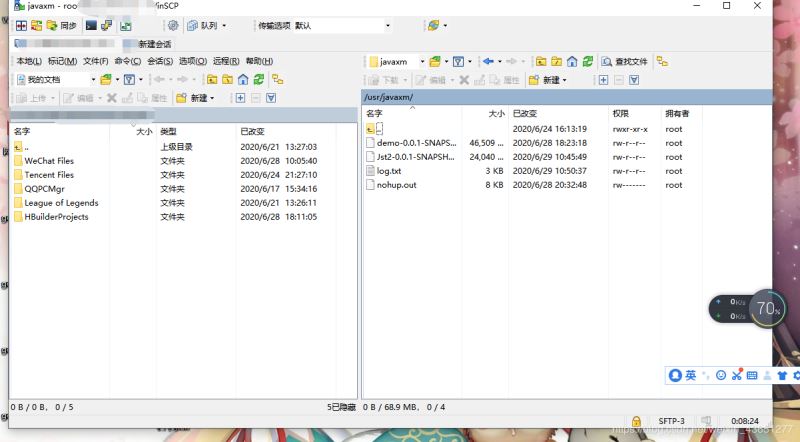
直接拖動即可
3.使用Xshell運行jar包
注:(服務器的java環境以及maven環境,各位請自行配置,這里不做描述。)
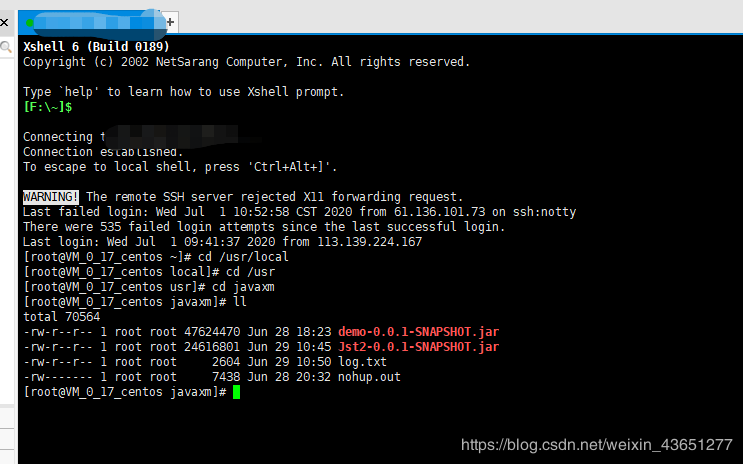
cd到jar包路徑下執行:nohup java -jar demo.jar >temp.txt &
執行啟動完兩個jar包后使用ip與端口號訪問接口
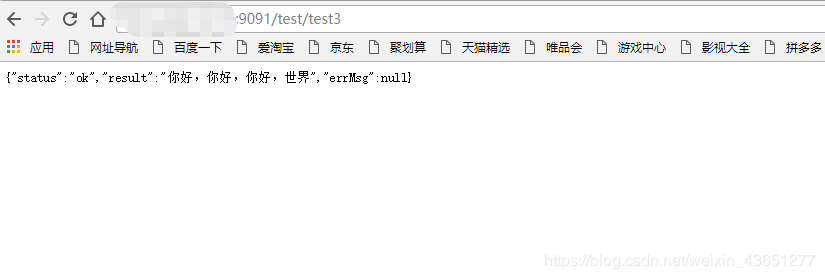
(注:測試接口)
4.下載安裝nginx
安裝教程
5.配置nginx.conf
**(注:*********代表服務器地址)
http {
 include  mime.types;
 default_type application/octet-stream;

 #log_format main '$remote_addr - $remote_user [$time_local] "$request" '
 #     '$status $body_bytes_sent "$http_referer" '
 #     '"$http_user_agent" "$http_x_forwarded_for"';

 #access_log logs/access.log main;

 sendfile  on;
 #tcp_nopush  on;

 #keepalive_timeout 0;
 keepalive_timeout 65;

 #gzip on;

 server {
  #監聽的端口號
  listen  80;
  #設置訪問的二級域名
  server_name demo.eysource.com;

  #charset koi8-r;

  #access_log logs/host.access.log main;

  location /{
  #配置訪問的項目路徑(注:這里重點)
  proxy_pass http:********:9091/
  # root html;
  # index index.html index.htm;
  proxy_set_header   Host $host;
  proxy_set_header X-Real-IP $remote_addr;
  proxy_set_header   X-Forwarded-For  $proxy_add_x_forwarded_for;
  client_max_body_size 100m;
  root html;
  index index.html index.htm;
   }
  }
 server {
  #監聽的端口號
  listen  80;
  #設置訪問的二級域名
  server_name aaa.eysource.com;

  #charset koi8-r;

  #access_log logs/host.access.log main;

  location /{
  #配置訪問的項目路徑(注:這里重點)
  proxy_pass http:********:8080/
  # root html;
  # index index.html index.htm;
  proxy_set_header   Host $host;
  proxy_set_header X-Real-IP $remote_addr;
  proxy_set_header   X-Forwarded-For  $proxy_add_x_forwarded_for;
  client_max_body_size 100m;
  root html;
  index index.html index.htm;
   }
  }
 }
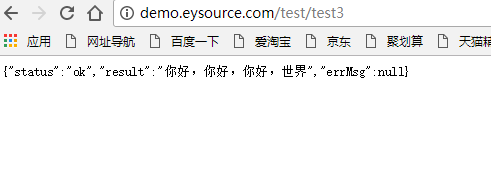
6通過域名訪問(成功)
總結
到此這篇關于服務器使用Nginx部署Springboot項目的詳細教程(jar包)的文章就介紹到這了,更多相關服務器部署Springboot項目 內容請搜索腳本之家以前的文章或繼續瀏覽下面的相關文章希望大家以后多多支持腳本之家!
