Golang有很多第三方包,其中的 viper 支持讀取多種配置文件信息。本文只是做一個小小demo,用來學習入門用的。
1、安裝
go get github.com/spf13/viper
2、編寫一個yaml的配置文件,config.yaml
database:
 host: 127.0.0.1
 user: root
 dbname: test
 pwd: 123456
3、編寫學習腳本main.go,讀取config.yaml配置信息
package main
import (
 "fmt"
 "os"
 "github.com/spf13/viper"
)

func main() {
 //獲取項目的執行路徑
 path, err := os.Getwd()
 if err != nil {
 panic(err)
 }

 config := viper.New()
 config.AddConfigPath(path)  //設置讀取的文件路徑
 config.SetConfigName("config") //設置讀取的文件名
 config.SetConfigType("yaml") //設置文件的類型
 //嘗試進行配置讀取
 if err := config.ReadInConfig(); err != nil {
 panic(err)
 }

 //打印文件讀取出來的內容:
 fmt.Println(config.Get("database.host"))
 fmt.Println(config.Get("database.user"))
 fmt.Println(config.Get("database.dbname"))
 fmt.Println(config.Get("database.pwd"))
}
4、執行go run main.go
輸出:
127.0.0.1
root
test
123456
ok!
補充:go基于viper實現配置文件熱更新及其源碼分析
go第三方庫 github.com/spf13/viper 實現了對配置文件的讀取并注入到結構中,好用方便。
其中以
viperInstance := viper.New() // viper實例
viperInstance.WatchConfig()
viperInstance.OnConfigChange(func(e fsnotify.Event) {
 log.Print("Config file updated.")
 viperLoadConf(viperInstance) // 加載配置的方法
})
可實現配置的熱更新,不用重啟項目新配置即可生效(實現熱加載的方法也不止這一種,比如以文件的上次修改時間來判斷等)。
為什么這么寫?這樣寫為什么就能立即生效?基于這兩個問題一起來看看viper是怎樣實現熱更新的。
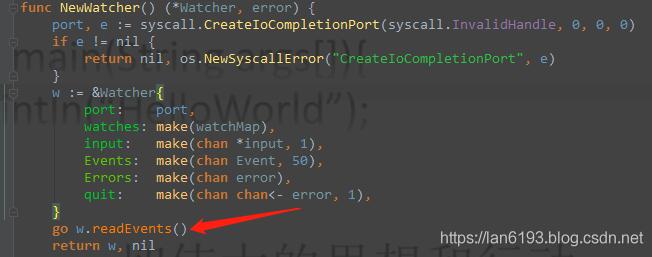
上面代碼的核心一共兩處:WatchConfig()方法、OnConfigChange()方法。WatchConfig()方法用來開啟事件監聽,確定用戶操作文件后該文件是否可正常讀取,并將內容注入到viper實例的config字段,先來看看WatchConfig()方法:
func (v *Viper) WatchConfig() {
 go func() {
   // 建立新的監視處理程序,開啟一個協程開始等待事件
   // 從I/O完成端口讀取,將事件注入到Event對象中:Watcher.Events
 watcher, err := fsnotify.NewWatcher()
 if err != nil {
 log.Fatal(err)
 }
 defer watcher.Close()

 // we have to watch the entire directory to pick up renames/atomic saves in a cross-platform way
 filename, err := v.getConfigFile()
 if err != nil {
 log.Println("error:", err)
 return
 }

 configFile := filepath.Clean(filename)  //配置文件E:\etc\bizsvc\config.yml
 configDir, _ := filepath.Split(configFile) // E:\etc\bizsvc\


 done := make(chan bool)
 go func() {
 for {
 select {
    // 讀取的event對象有兩個屬性,Name為E:\etc\bizsvc\config.yml,Op為write(對文件的操作)
 case event := -watcher.Events:
 // 清除內部的..和他前面的元素,清除當前路徑.,用來判斷操作的文件是否是configFile
  if filepath.Clean(event.Name) == configFile {
    // 如果對該文件進行了創建操作或寫操作
  if event.Opfsnotify.Write == fsnotify.Write || event.Opfsnotify.Create == fsnotify.Create {
  err := v.ReadInConfig()
  if err != nil {
  log.Println("error:", err)
  }
  v.onConfigChange(event)
  }
  }
 case err := -watcher.Errors:
     // 有錯誤將打印
  log.Println("error:", err)
 }
 }
 }()
 watcher.Add(configDir)
 -done
 }()
}
其中,fsnotify是用來監控目錄及文件的第三方庫; watcher, err := fsnotify.NewWatcher() 用來建立新的監視處理程序,它會開啟一個協程開始等待讀取事件,完成 從I / O完成端口讀取任務,將事件注入到Event對象中,即Watcher.Events;
執行v.ReadInConfig()后配置文件的內容將重新讀取到viper實例中,如下圖:
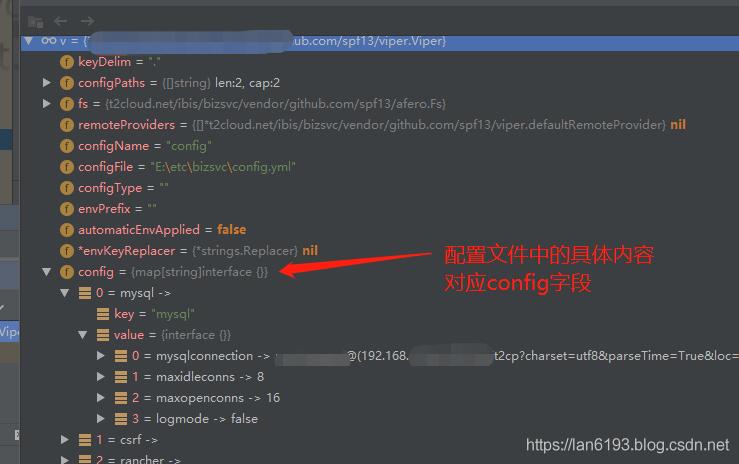
執行完v.ReadInConfig()后,config字段的內容已經是用戶修改的最新內容了;
其中這行v.onConfigChange(event)的onConfigChange是核心結構體Viper的一個屬性,類型是func:
type Viper struct {
 // Delimiter that separates a list of keys
 // used to access a nested value in one go
 keyDelim string

 // A set of paths to look for the config file in
 configPaths []string

 // The filesystem to read config from.
 fs afero.Fs

 // A set of remote providers to search for the configuration
 remoteProviders []*defaultRemoteProvider

 // Name of file to look for inside the path
 configName string
 configFile string
 configType string
 envPrefix string

 automaticEnvApplied bool
 envKeyReplacer  *strings.Replacer

 config   map[string]interface{}
 override  map[string]interface{}
 defaults  map[string]interface{}
 kvstore  map[string]interface{}
 pflags   map[string]FlagValue
 env   map[string]string
 aliases  map[string]string
 typeByDefValue bool

 // Store read properties on the object so that we can write back in order with comments.
 // This will only be used if the configuration read is a properties file.
 properties *properties.Properties

 onConfigChange func(fsnotify.Event)
}
它用來傳入本次event來執行你寫的函數。為什么修改會立即生效?相信第二個疑問已經得到解決了。
接下來看看OnConfigChange(func(e fsnotify.Event) {...... })的運行情況:
func (v *Viper) OnConfigChange(run func(in fsnotify.Event)) {
 v.onConfigChange = run
}
方法參數為一個函數,類型為func(in fsnotify.Event)) {},這就意味著開發者需要把你自己的執行邏輯放到這個func里面,在監聽到event時就會執行你寫的函數,所以就可以這樣寫:
 viperInstance.OnConfigChange(func(e fsnotify.Event) {
 log.Print("Config file updated.")
 viperLoadConf(viperInstance) // viperLoadConf函數就是將最新配置注入到自定義結構體對象的邏輯
 })
而OnConfigChange方法的參數會賦值給形參run并傳到viper實例的onConfigChange屬性,以WatchConfig()方法中的v.onConfigChange(event)來執行這個函數。
到此,第一個疑問也就解決了。
以上為個人經驗,希望能給大家一個參考,也希望大家多多支持腳本之家。如有錯誤或未考慮完全的地方,望不吝賜教。
您可能感興趣的文章:- Golang 限流器的使用和實現示例
- Golang實現請求限流的幾種辦法(小結)
- 聊聊Golang中很好用的viper配置模塊
- golang常用庫之配置文件解析庫-viper使用詳解
- golang 使用 viper 讀取自定義配置文件
- golang接口IP限流,IP黑名單,IP白名單的實例
